

List of Supplies:
-Good-quality drawing paper, such as Arches, Strathmore, or a nice quality watercolor paper. Must be 100% rag, and be thick enough to sustain being sewn. Cut one base piece to the desired size of the completed quilt.
-Quilting pattern pieces.
-Collage materials (I used pages from an old hymn book for this project), cut to desired sizes.
-embroidery floss and needle.
-A small awl.
-Gesso
-Acrylic paints, assorted colors.
-Paint brushes, ranging in sized from very large to small.
-Scissors, a rotary cutter, or utility knife.
-Mod Podge, or decopage glue.
-Pencil.
-Acid free glue stick.
-Rags.
Step one: Start off with a quilt pattern. You can make your own, or use a pre-made pattern. Just remember: quilt patterns have a 1/4" extra added to each edge for seam allowance. Be sure to remove that 1/4", or your pieces might not fit together correctly.
Trace and cut out pieces.

Step two: Prepare the base piece. You may skip this step if you'd rather paint the whole quilt. Using Mod Podge (a decopage glue), thinned out with a little water, coat the base piece, in small sections. Apply your collage materials, and brush another coat of Mod Podge over the top. You may need to apply another coat once the base piece is dry.

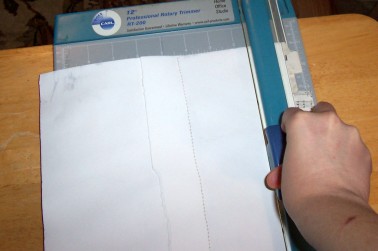
Step three: Once the base piece has dried thoroughly, trim the edges (you may use a rotary cutter, scissors, or a utility knife).
Step four: Draw guidelines (in pencil) to determine where to place you quilting pieces. For this quilt, I drew two perpendicular lines that intersected in the center of the base piece. Place your pieces, using an acid free glue stick.

Step five: Using an awl, punch all of your stitch holes.

Step six: Stitch on pieces. If preferred, you may use a sewing machine set on a zig-zag stitch. However, this may cause damage to your sewing machine. If you choose to use a sewing machine, skip step five.

Step seven: Gesso the sewn-on pieces. One to two coats should be enough. Don't worry about gessoing over the embroidery floss.
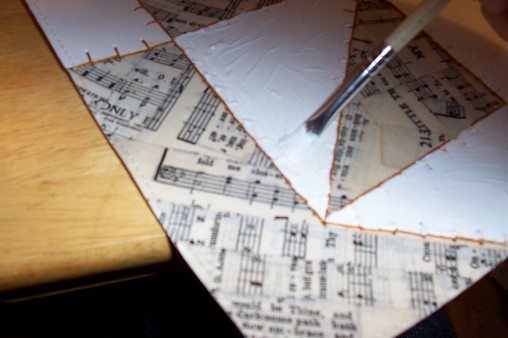
Step eight: Apply a ground to all of your gessoed pieces. I chose lemon yellow for this particular quilt.

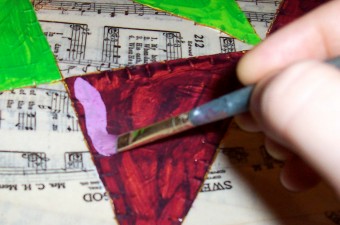
Step nine: After the ground has completely dried, apply a flat coat of color over the ground. Apply the paint thinly enough so that the ground shows through a little.

Step ten: Add in highlights, blending in for a smooth transition.
Step eleven: Using a thinned down mixture of blue and brown, paint in shadows to emphasize the edges of the sewn pieces.
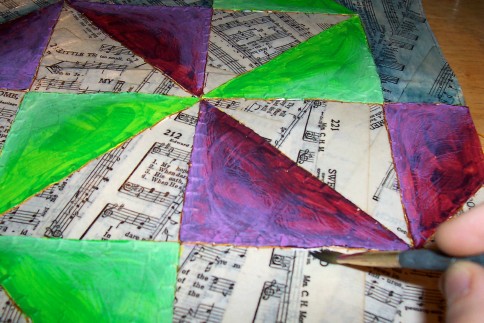
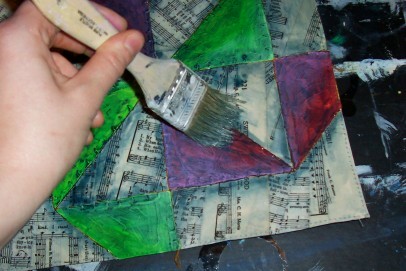
Step twelve: Once entire painting is completely dry, apply a very thinned out layer of the same blue and brown mixture all over the entire painting. Using a large, dry brush, lift up excess paint. Using a dry brush, and a rag, continue gently lifting up paint until desired effect is reached.
To see more examples of paper quilts, click on my previous blogs: "Waste Not Want Not", and "More Quilting Action".
If you have any questions or comments about this project, or my other work, please email me: nancymichaud@gmail.com , or post a comment on this page.
I've got more work online!
www.portfolios.com/nancymichaud
Tee shirts, postcards, and other fun stuff!
www.cafepress.com/nancymichaud
1 comment:
Nancy Michaud, you are so creative and talented. This paper quilt is so wonderful and beautiful that I wish you could use it for the ceiling, wall, decorations or tent for the fairy tale, Heart of Stone. This paper quilt would be awesome for the double wedding of Vanity with Prince Charming and Joy to Prince William. Congratulations again with best wishes to a prosperous future full of love, good health and happiness. Respectfully, Ana Monnar www.ReadersAreLeadersUSA.net
Post a Comment